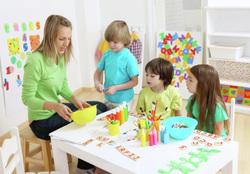
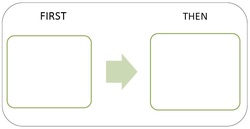
 Children with learning differences, learning disabilities and developmental disabilities such as autism spectrum disorders often have difficulty coordinating information between their senses, and integrating information presented through one mode into output through another mode. For example, they may have difficulty listening to a teacher's voice, processing the information, and then having to write a paragraph based on the auditory information. Extra processing time is often needed in the moment. Other strategies can help you effectively teach students with visual motor difficulties:
3 Comments
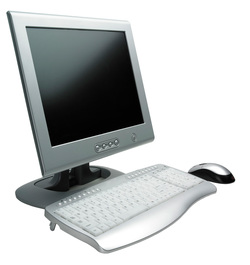
 There are lots of great ideas in terms of using computers within the classroom. Sure, we are bound by funding and other challenges, but keep some of the following in mind when considering how to use yours. Too few computers for too many students? You could time-share pairs of students, have them all work together, or have some on computers while others do related curriculum activities. Also, remember that not all students have the same ability level with computers, or even ability to access computers at home, so their usage and support needs in the classroom may differ. Do you plan on using e-communication, prepackaged learning resources, or use the two together? Computer-mediated communication will enable you to contact students and receive communications from them. Chat rooms and access to the Internet can bring a wider input from different sources to support your work. Electronic bulletin boards or forums allow students to post and read messages, and allow file sharing between staff members and students. Teachers can now set up classroom pages for free through www.weebly.com, where they can post messages and information such as photos or worksheets as well as enrichment activities and information, create forums with administrative privileges, and communicate with other staff and students. Worksheets or information summaries can be scanned in and printed. Information can be manually entered into such programs as Kidspiration to organise materials visually, or create an assortment of webs or flow charts than can be printed, or emailed to home for use there. Kurzweil software allows students to copy and paste a passage in and it will read it aloud for the student. With the abundance of e-books now available, this is becoming easier as scanning isn't always necessary. Consider the information accessible via the computer. Is it relevant, accurate, or appropriate? You need to provide "useful" sources (material you have already checked), information about how to use search engines or CD/DVDs which includes the material you have chosen. Each is a valuable approach, and while you might begin with one or the other, you should eventually come to use all three (and others). Can you use a computer to assess student work? You may have the students submit homework via email, develop chat groups where chats can be monitored, or even have students in the classroom simply save their work to their own desktop file folder. What a wonderful opportunity to teach organizational skills in conjunction with computer skills. Teach students how to create subfolders within their folder to organize materials - good copies, drafts, subject folders, etc. Work could be posted if desired and peer reviewed. There are also an abundance of online polls that could be used to submit information. Initially, motivation is high when the students are introduced to the computer. The novelty of computers will attract them, and most students will already be familiar with them, having played some computer games. The spell check is a great support, especially to those having problems with spelling, and keyboards erase handwriting challenges, having great self esteem benefits. How are you using computers in your classroom? Let's share our ideas! (To view with pictures, please click here)
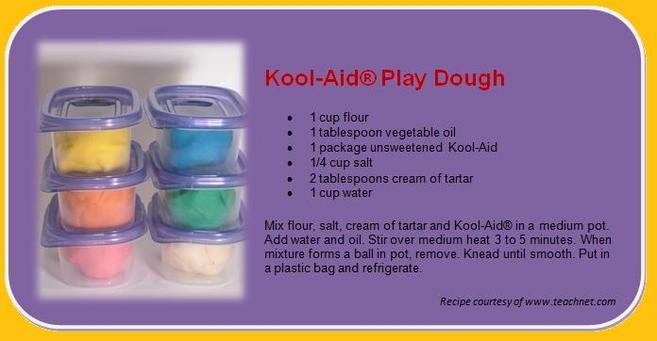
Last year, I purchased the Discovery Toys starter kit, because I had used so many of their toys in the past, and they are fantastic for therapy and teaching. I didn’t want to sell the products; I just wanted $420 in toys for $140 and access to the consultant discount . Some were Christmas gifts, some were used in therapy and teaching, and some are in my own children’s playroom. Here are 10 of my favourite toys, and how I use them – not all are Discovery Toys – it’s my all-around favourite toys list. 1. Progressive Puzzles – these are great because they are step by step. There are simple-picture puzzles ranging from 4 to 9 pieces. I take it one step further and photocopy the puzzle onto cardstock, and place this inside the puzzle frame at first. You can then fade out the picture so the child next completes the puzzle without it (technically, he’s matching when that visual is included, not doing a puzzle), then later complete the puzzle without the frame at all. I use these as part of the ABLLS Visual Performance Domain. 2. Castle Marbleworks for early learners, and Marbleworks for older children. Great for problem solving, Marbleworks allows me to connect and expand communication skills while building the track (building on prepositions, turn taking, sharing, colours, shapes, following instructions, asking for help, and so many others). Plus, it allows me to use the marbles as reinforcers throughout the activity, and provides visual sensory reinforcement. While engaged in such a fun activity, it’s easy to slip in targets and maintain reinforcement throughout. 3. Wiz Kids – great for working on feature/function/class. It’s a set of cards – half have a letter on them with a point value (like in scrabble), and the other has a category. You pull one of each, and see who can come up with something from the category starting with that letter. Ignore the letters to make it simpler if you choose, so simply coming up with something that is part of that category is the goal. Great travel game as it’s just a small card box, and scorekeeping is as simple as holding the cards with your points on them. 4. Don’t Break the Ice – Not a DT toy, this one is available at your local toy or department store, and works as a great motivator. It’s fun and very easy to play (you take turns hammering plastic ice blocks out of a frame until the skating bear figure falls in). I begin the game setup, leaving maybe 10 blocks out. I hold onto the last 10 blocks, giving one to the child I’m working with for each response he provides, as a reinforcer (essentially a token system). When he has all the blocks, we can play the game together. 5. Rainfall Rattle – simply put, the most popular sensory bin toy I’ve ever had. Small beads rain down through colourful disks, making the sounds of rain, and a visually stimulating show. 6. Roll & Play – simple game where you roll the big stuffed die, pick up a card with a colour match to what you rolled, and act out what is says on the card. Great for building motor imitation skills, vocabulary, and following instructions. 7. Giant Pegboard – great for working on visual matching, imitation, sorting by shape and / or colour, patterning, and horizontal / vertical block design. Again, I love to build in reinforcement by ending with an activity to build the tallest tower we can, and crashing it over. 8. Tangiball – another popular sensory bin toy, the Tangiball smells great (small smells like Vanilla, and big smells like strawberry). They squeak when squeezed gently, and have a nubby texture that’s great for tactile and proprioceptive input. 9. Flip Flop Faces – one of the most fun ways to teach emotions I’ve ever seen. Cartoon facial expressions are printed on the outside of plastic bowl-shaped domes. Domes are placed open side up (face side down), and when a beanbag (labelled with the corresponding emotion word) is thrown into it, it flips itself over and you can see the face. 10. Play Doh (store bought or homemade) – well, what list is complete without Play Doh? Rolled along your child’s hands and forearms for deep pressure input, used with teaching imitation, written in to develop letter awareness, shaped to develop shape awareness, scented with Kool Aid to provide olfactory sensory input, used as a stand for the abovementioned Wiz Kids cards – the possibilities are endless. Do you have a favourite recipe? Mine is posted in a previous blog post at www.fullspectrumlearning.ca. Get some of your Christmas shopping done and shipped direct to you without having to leave home. Products above as well as many many more can be purchased online at www.discoverytoyslink.com/caseyburgess. Proceeds go to support local programs for children with Autism Spectrum Disorders. If you are interested in a great kit of toys with or without deciding to sell or in a business opportunity with great product discounts, tax writeoffs, and a fun way to make extra income (or even start a new career), please visit www.discoverytoyslink.com/caseyburgess. Contact me for more information. WOW * WAY TO GO * SUPER * THAT’S INCREDIBLE! * OUTSTANDING * EXCELLENT * GREAT * GOOD * NEAT * WELL DONE * REMARKABLE * I KNEW YOU COULD DO IT * I'M PROUD OF YOU * FANTASTIC * WHAT A SUPERSTAR * NICE WORK * LOOKING GOOD * YOU'RE ON TOP OF IT * BEAUTIFUL * NOW YOU'RE FLYING * YOU'RE CATCHING ON * NOW YOU'VE GOT IT * YOU'RE INCREDIBLE * BRAVO * YOU'RE FANTASTIC * HURRAY FOR YOU * YOU'RE ON TARGET * YOU'RE ON YOUR WAY * YOUR HARD WORK PAID OFF * SMART * GOOD JOB * THAT'S INCREDIBLE*YOU DID IT * DYNAMITE*WHAT A TALENT * YOU'RE UNIQUE * NOTHING CAN STOP YOU NOW * GOOD FOR YOU * I LIKE THAT * YOU'RE A WINNER * REMARKABLE JOB * BEAUTIFUL WORK * SPECTACULAR*YOU DID IT! * YOU'RE SPECTACULAR*YOU GOT IT JUST RIGHT * WONDERFUL TRYING * GREAT DISCOVERY * YOU'VE DISCOVERED THE SECRET * YOU FIGURED IT OUT * FANTASTIC JOB * HURRAY * BINGO * MAGNIFICENT * MARVELOUS * TERRIFIC * WHOOHOO! * PHENOMENAL * SENSATIONAL * SUPER WORK * CREATIVE JOB * SUPER JOB * FANTASTIC JOB * EXCEPTIONAL PERFORMANCE*NICELY DONE*HIGH FIVE * YOU SHOWED GREAT RESPONSIBILITY * THAT’S SO EXCITING * YOU LEARNED IT RIGHT * WHAT AN IMAGINATION * WHAT A GOOD LISTENER * YOU ARE SO MUCH FUN * GOOD CHOICE * YOU TRIED HARD*THAT WAS A GREAT IMPROVEMENT * BEAUTIFUL SHARING * OUTSTANDING PERFORMANCE * YOU'RE A GOOD FRIEND*GREAT TRYING * YOU'RE IMPORTANT HERE* I LOVE HOW YOU DID THAT * YOU LEARNED SOMETHING NEW * YOU HAVE A NEW SKILL * I RESPECT HOW YOU DID THAT*YES! * THAT'S CORRECT * WHAT A JOY*THAT’S EXACTLY IT * WONDERFUL*PERFECTLY DONE * AWESOME * A+ JOB*YAY! * YOU MADE MY DAY * THAT'S REALLY COOL*YOU WORKED SO HARD AND IT PAID OFF*THAT’S IT EXACTLY*YES, KEEP IT UP*FABULOUS
For a printable copy for your home or classroom, please click here  Creating Your Own Visual Supports First of all, check out available web sites to see if the visual you want is already made. My favourites: www.fullspectrumlearning.ca www.autism.net www.do2learn.com www.setbc.org/curriculumset www.setbc/pictureset If not, here we go... Open Word (or a comparable word processor, but I’m familiar with Word). Decide what you want the visual to say. Write the text in, leaving room for pictures to be added in. Don’t worry about borders or anything just yet – that’s easier at the very end. Right now, you just want a simple layout. Adding Pictures and Graphics Make sure the cursor is at the bottom – it will make adding pictures easier. Wherever the cursor is is where the picture will end up, and sometimes it temporarily shifts the words around. They will self-correct when you do the next few steps either way, but if you ever panic, just click edit/undo. It will undo what just happened. You can back up a few steps this way by clicking edit/undo a few times. Adding Graphics and Pictures Built In To Word Insert Shapes: You can click on “insert” for a variety of options – you can add shapes, call-outs (what someone is saying or thinking), line arrows, block arrows....even arrows that you can add text into! Just click insert / shapes, and select the one you want. When it shows up, you can drag the dots around the border to make it bigger, smaller, thinner, or wider. You can select it, then click “text wrapping” and choose “in front of text” to make it easier to move around where you want it by simply dragging it. You can click the yellow dot on some to make part of the shape bigger (such as the pointy part of the arrow). You can click the green dot to rotate the shape around. Insert a text box: You can insert a “text box” or a piece of text that you can shift around as if it were in a box. Click insert / text box and choose the kind of text box you want from the pop-up. When it shows up in your document, just type into it. You can right click the text box and play around with the style – removing the border, filling it with a colour, and so on. Inserting clip art: You can click insert / clip art and a window will pop up on the right. Enter a search term, and a selection of items will pop up. When you click one, it will insert into your document. You can adjust the size with the corner dots, rotate it with the green dot, or even flip it over by dragging the dot on one side across to the other side. Smart Art: Smart Art is included with newer versions of windows, allowing you to use pre-made graphs, flow charts, and so on. Play around with them – they work just like layers of pictures all together. If anything is too tricky, leave it out, and draw it in by hand after. It isn’t worth getting too anxious over. Adding In Your Own Photos To add in your own photos from your computer, click insert / picture and navigate to the picture you want to enter. When it pops into your document, click the picture to select it, then click “text wrapping”, and select “in front of text”. Then you can move it around to where you want it. Use the border dots to resize. Adding Internet Photos Google Images: To add in pictures from the internet, you can use Google Images . Open Google, click on “images” in the top left, and enter the item you are looking for. Be cautious with young children around – you never know what will pop up. Browse through the pages until you find the picture you like; you can see the full sized version by clicking on it, then clicking “see full sized image”. From there, you can right-click the picture and click “copy”. Go back to your Word document and click “paste.” It will show up where your cursor was with a frame of black squares around it. To make it easier to move it around where you want it, click it, and at the top, click on word wrapping, then ‘in front of text’. The border squares are no longer solid, and you can just drag the picture where you want it, as well as resize by dragging the dots in the corners. You can do the same with pictures from web sites. Right click, then click “copy”. With both google images and web site images, though, be aware of copyright issues. If you are using pictures for your own personal use, it is usually ok, but if you are sharing the images, please request permission from the owner. Flickr Creative Commons: On Flickr.com, you can click on “Creative Commons”. This is a collection of images that the artists have provided permission for the public to use. Restrictions for each are indicated. It’s a good idea to use this route if you plan to share your visuals with others or to distribute them otherwise. You will need to click the image, download it, then you can enter it into a document like you do your own photos. Final touches Play around with Word – I like to add a border to my visuals to make them look nicer and easier to cut out. You can do this by inserting a shape – a square, perhaps. Draw the shape around the edge of your visual, then right click it and select “send to back” and/or “send behind text”. Add your copyright – it’s your work! Click ctrl/alt/c for the copyright symbol, and add your name and the year you created it! Remember that there are lots of sources of help out there. If you run into trouble, email me – I would be glad to help you out! © Casey Burgess, 2010 www.fullspectrumlearning.ca This is your new blog post. Click here and start typing, or drag in elements from the top bar.
|
AuthorCasey Burgess has a B.Sc.in Psychology, an M.A. in Education (Curriculum and Instruction), and a Ph.D. in progress in Education (Cognition and Learning). She has 20 years experience with direct service, curriculum development, workshop facilitation, and supervisory experience supporting children who have Autism Spectrum Disorders, and their families. She currently frames her work using a developmental, relationship-based, self-regulation lens. Archives
June 2021
Categories |

 RSS Feed